Wednesday, December 19, 2012

Tuttorosso: Tomato-Basil Parmesan Soup (Crockpot Recipe)

A few weeks ago Tuttorosso generously sent me a giftpack with several of their products and a few other goodies. The package arrived on my doorstep the exact day I had been planning on making some tomato soup, similar to a recipe I had come across on Pinterest.

tuttorusso

Tomato-Basil Parmesan Soup

slightly adapted from The Girl Who Ate Everything

Ingredients:

1 28-ounce can Tuttorosso crushed tomatoes with basil

1 large carrot, chopped

1/2 of a large onion, chopped

1 tsp dried oregano

1 T dried basil

4 c low sodium chicken broth (or vegetable if you prefer)

1 bay leaf

1/4 flour

1/2 butter

1 c grated Parmesan Reggiano cheese

2 cups 2% milk, warmed (or plain, unsweetened almond milk)

salt and pepper, to taste

Add tomatoes, chopped carrot, onion, oregano, basil, bay leaf and chicken broth to your crockpot. Heat covered on LOW for 5-7 hours. (Optional: I added in the rind from my parmesan cheese to the soup – I recommend doing it if you have the rind.)

With at least 30 minutes left before serving, puree vegetables with an immersion blender OR transfer to a blender and puree and then return pureed vegetable to crockpot.

Prepare your roux. Melt butter over low heat in a skillet and add the flour. Stir the roux constantly for about 5-7 minutes. Slowly whisk in one cup of the soup. Add another 3 cups until smooth. Transfer the soup back into the crockpot. Stir and add parmesan cheese, warmed milk and salt and pepper.

Cover and cook on low for another 30 minutes or so until ready to serve. Serve with crackers or bread, I served mine with some garlic naan.

Enjoy.

soup

The Tuttorosso products were sent to me at no cost for review. In my honest opinion, I think that the product was of exceptional quality and contributed to this fresh and flavorful tasting soup. I am in no way receiving compensation for my opinions.

Friday, December 7, 2012

Homemade Cookie Butter

You’re rolling your eyes.
Yes, cookie butter is so last year, I mean, I really did post about it last year.
But you see, it’s a rare thing that I visit one of my best friends in NYC.

And it’s a rare thing that I find someone else in my small circle that knows what cookie butter is. Or sends me a picture of it smeared on her plate during the dessert course at every holiday meal.

She just gets cookie butter like I do.

Now I realize Biscoff is much easier to find these days (I’ve seen it at Christmas Tree Shop, Walgreens and the supermarket), and you can get the Speculoos spread at Trader Joe’s, no problem. But homemade is always more special.

cookiebutter

Ingredients

  • 1 package almond windmill cookies (Biscoff cookies or the like will obviously do)
  • 1/3 c melted and cooled coconut oil
  • 2 T Turbinado sugar (feel free to use brown sugar or molasses too)
  • 1/2 t pure vanilla extract
  • 1/4 t cinnamon
  • 1/3 c unsalted cashews
  • 2 t vegetable oil

Put your cookies and cashews into a food processor and process until they are a powder and no chunks remain. Add coconut oil (I melted mine to measure it and then let it cool for a few minutes – you want it in its liquid form), sugar, cinnamon and vanilla. Continue to process until it starts to form a butter. You may need to stop and scrape down the sides a few times. Add vegetable oil by the teaspoon as needed to thin out the butter… I used 2 teaspoons but you may need more or less.

Note: You may need less coconut oil depending on the amount of cookies you use. You can add the oil gradually until the butter is the consistency desired.

As a rule, I store most homemade things in the fridge but know that the coconut oil will harden in there so you will want to remove the butter from the fridge about a half hour before using for ease of spreading.

cookiebutter2

Cookies + cashews…

cookiebutter3

Butter!

Put it in a cute little jar and give as a gift, or do like me and put it in a small Rubbermaid container.

Enjoy with fruit, in recipes (google cookie butter – you will find a TON) or straight out of the jar!

Friday, October 5, 2012

Broke

Two weeks after I wrote my last post, I did this…

IMG_0809

Only, that, became this…

IMG_0829

Full-shot, now…

IMG_0831

I broke my hand, requiring not only surgery on the broken bone itself but also a bone graft from my wrist to “rebuild” said broken bone in my hand.

While it has been an uncomfortable and frustrating injury, I’m on the mend and hopefully with a lot of luck, and minimal PT, I’ll be up and going again (I was going to say blogging but we both know that that’s an empty promise.)

Saturday, September 1, 2012

San Diego Photo Post 1

Back in July, Matt and I went to San Diego and I have yet to post about the trip but thought I’d share some photos until I can get around to writing a recap post.

sd1

{Gaslamp Quarter}

sd2

{Flatbreads at barley mash. Our favorite spot of the trip}

sd3

{View of Petco Park from our hotel’s roofdeck}

sd4

{Iron Fries: “The Far East Side” pork belly, grilled chicken, teriyaki sauce, green onions, celery, house made kimchi!, wasabi cream and toasted cashews… in other words, YES YES YES!}

sd5

{Harborside sunset}

sd6

{Granola waffle = lovely all day foodbaby}

sd7

{Tim Burton’s Electrifying Graden (temporary exhibit for Comic-Con 2012}

Thursday, August 23, 2012

Sweet Potato Pancakes

Life. is. so. crazy.

Eat pancakes, for dinner.

With chocolate chunks.

And coconut butter.

And then get back to your crazy life.

pancake1

Why is life crazy? Oh, let me count the ways…

I had 7 days, yes 7, off between grad school semesters. And I still had to work, all-day, every day.

Then my (rented) house went on the market, and in the midst of starting up with classes again (3 more credits than past semesters – what.am.i.thinking?) I have to temporarily relocate every few hours, every day.

Including today (I took a “vacation” day to get things done around the house which is now a bust since I can’t).

So I relocated, to the beach… (to read my neuro text, of course.)

And then to the gym.

And then made these before forced to relocate again.

Sweet Potato Pancakes (vegan)

Ingredients:

1/2 c coconut flour

1/2 c unbleached ap flour

1 scoop vanilla protein powder (optional—I used a sample of a vegan protein)

2 T turbinado sugar (this is a raw sugar—you can use brown sugar if you wish)

1/2 t baking powder

1/4 t baking soda

1 1/2 t cinnamon (or pumpkin pie spice if you wish)

1 1/2 c almond coconut milk (I accidentally bought sweetened, if yours is unsweetened you may want to increase sugar by a tablespoon or 2)

1 heaping cup of shredded sweet potato (I shredded mine in the food processor, did you know you could do that? I didn’t. No more hand grating for me!)

oil for pan

coconut butter, for topping (optional—but really not)

vegan chocolate chunks, for topping

maple syrup, for topping

Instructions:

Mix all listed ingredients through the almond milk, create “well” and add sweet potato. Mix thoroughly but don’t over mix (I don’t know why but that’s what the pancake pros say). Batter will be thick. Add additional almond milk by the tablespoon if you prefer working with a thinner batter but it’s not necessary.

Heat oil in your skillet (or whatever you use to cook pancakes) to med-high.

Drop batter by 1/4 c onto heated surface. You may want to use the back of your spoon to flatten a bit as the batter is thick and doesn’t spread on the pan. Cook pancakes until done, not sticking to pan and can be flipped. I usually “eyeball” the doneness of my pancakes but usually a few minutes on each side.

Top with a drizzle of coconut butter, sprinkle of dark chocolate chunks and syrup.

Serves 4.

pancake2

Wednesday, July 25, 2012

Foodler

Though not a stranger to foodler.com, I wasted no time responding when Rachel of Boston Food Bloggers put a message up on facebook asking if anyone was interested in receiving a $15 credit at foodler to use in return for a review post. Two things I never turn down: free money and an excuse to order-in.

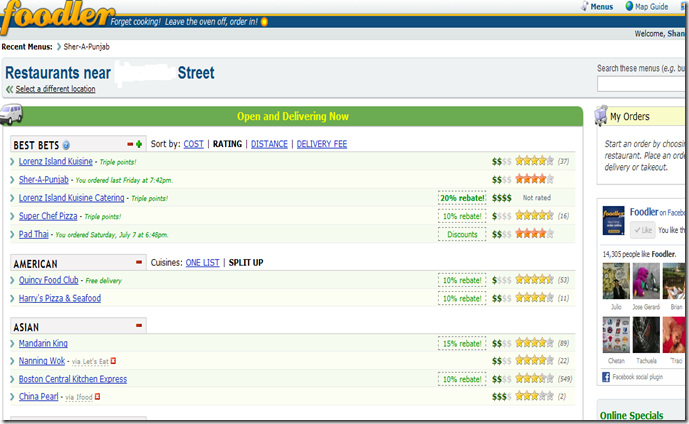
If you’ve never used foodler, it’s pretty straight forward. You enter in your address or a city and it returns a list of places that you can order from using the site.

foodler5

Some of them are close by and others are not-so-much. You can narrow it down by distance… although some of those not-so-close-by will deliver for $10 or so. There are quite a few places in Quincy that use foodler so we’ve never had a hard time picking a place to order from. Another cool feature of foodler? It stores what you’ve ordered so you can look back (great feature because sometimes I can’t remember what I’ve tried… or if there was something I really liked, I don’t always remember what it was.)

foodler6

As you can see by the star ratings, you can rate not only the restaurant itself, but each individual dish you ordered. I love this feature – I definitely use it as a reference when ordering something I’m unfamiliar with and to review what I ordered for other users. Yet another perk of using foodler? There are always coupons (for free items when you spend a certain dollar amount) or rebate offers (at least on your first order from a particular place – it’s usually between 10 and 20% and gets “refunded” back into your foodler account for a future order.)

foodler7

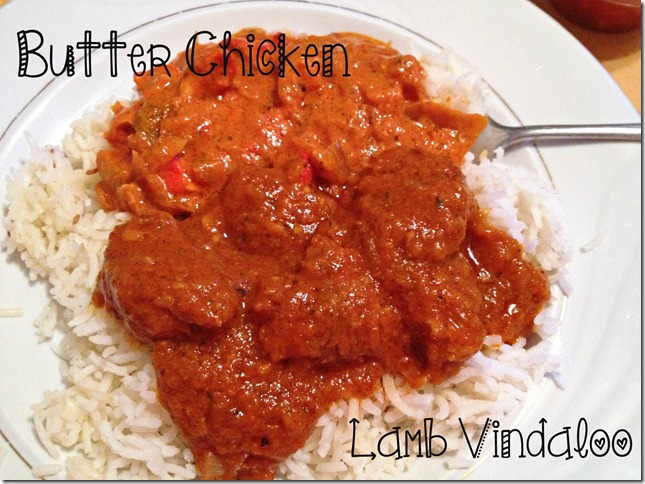
On Friday night we decided to order from Sher-A-Punjab, a newer Indian restaurant in Quincy. This was our first time ordering from there but they had great reviews, for our entrees we went with:

foodler1

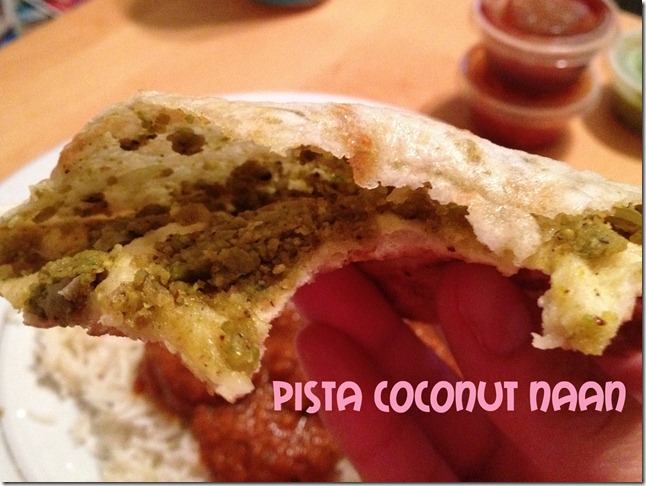
And no Indian meal is complete without some naan, to mix it up we went with:

foodler2

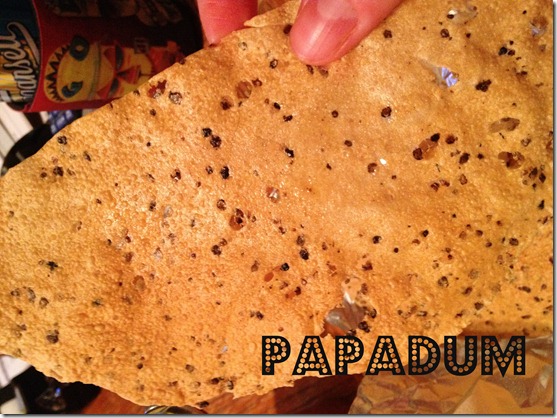
This was delicious… it is described as a tandoor cooked naan with pistacio and coconut. And of course, the “chips and salsa” of Indian food:

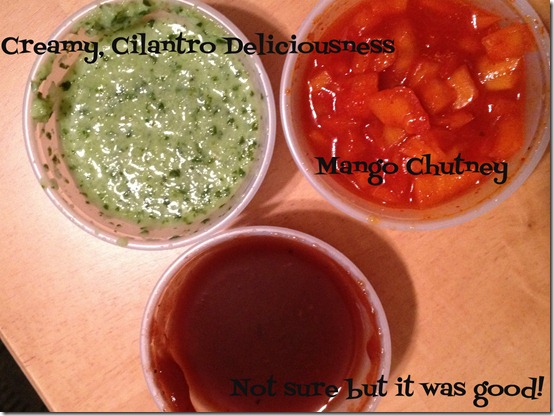
foodler3

with a trio of sauces:

foodler4

Everything truly was delicious and arrived via delivery faster than promised! You can pay using any major credit card and store different addresses – it remembers where you’ve had food delivered to so you don’t have to type everything in every time you order. You can also add any tip to the delivery driver right into your credit card transaction… or pay in cash upon arrival if you wish. Credit or not, we will definitely be using foodler.com again and again.

*Disclaimer, a $15 credit for use at foodler.com was given to me in exchange for this review. However, my opinions are completely mine and truthful.

Tuesday, May 22, 2012

Chicken Mango Curry

chickenmangocurry

Look friends, a recipe post! I actually made this dish a few weeks ago but couldn’t find the card reader for my memory card – no memory card = no pictures = no post (because look how beautiful this dish is!)

Chicken Mango Curry

adapted with few changes from simply recipes

serves 4

Ingredients:

  • 1 T grapeseed Oil (or vegetable oil)
  • 1 c chopped peppers (I used a frozen medley of red, yellow and green, thawed)
  • 2 garlic cloves, minced
  • 2 T curry powder
  • 1 T ginger (or use 2 T fresh minced ginger)
  • 1/2 t cumin
  • 1 c chopped mango (I used frozen, thawed)
  • 2 T apple cider vinegar
  • 1 can light coconut milk (or regular if you prefer)
  • 1 lb chicken breast, cut into bite-size pieces
  • salt and pepper
  • cilantro, for garnish

Directions:

Heat oil in a large sauté pan over medium heat. Add pepper and cook, stirring occasionally, about 5 minutes. Add garlic and ginger and cook for another minute. Add  curry powder and cumin, cook for a few more minutes. The spices will absorb most of the oil, so add up to an additional tablespoon of oil to the pan if needed to prevent sticking.

Add vinegar, coconut milk, and a 1/2 cup of the chopped mangoes to the pan. Increase heat and bring to a boil, then lower it to maintain a low simmer for about 15 minutes, stir occasionally. Remove pan from heat. Scoop the sauce into a blender or food processor. Purée the sauce until it’s smooth. Return the sauce to the pan.

Add chicken pieces to the pan. Return to a low simmer. Cover the pan and let cook for 8-10 minutes. Chicken should be just cooked through. Check the thickest piece of chicken for doneness.

Add the rest of the chopped mango to the pan. Let cook at a very low temperature for another minute or two, uncovered. Add salt and pepper to taste. Serve over a bed of basmati rice, garnish with freshly chopped cilantro.

Enjoy!

Tuesday, May 8, 2012

Since you’ve been gone away

I had the month of April off from grad school. My intentions were to go to the gym (almost every day, I was being reasonable), blog more and clean my apartment from top to bottom. I was unsuccessful at all of those things. And what bothered me the most? The blogging one. I miss blogging, I really do. And I honestly don’t know how all of you who have jobs, go to school, have families, etc. have time for it. Maybe it’s just that I don’t make the time for it, I don’t know. But then I got to thinking. Do I blog so I can put content out there to inspire others or did blogging inspire me in ways I never expected? In the end I realized that before blogging my spice collection consisted of dried oregano and garlic powder. Now I have spices in there I cannot pronounce but I’m proud to say I use on the regular. Before blogging I never made my own pizza dough, cinnamon rolls or any ethnic inspired dish other than enchiladas. I’d love to say that I’m making a comeback, really I would. But I can’t promise it.

Tonight marks the first night of classes for my 3rd grad school term. Like a nerd in a bookstore (read: me), I’m half excited to listen to my professor go over the syllabus and half anxious about the time the work will take away from catching up on Mad Men on netflix. Or tackling my never ending, always growing laundry pile. And dishes? I can’t even find my sink anymore. See? My priorities are skewed at best but in the end, I know that reading another chapter from my Aural Rehabilitation textbook is probably more important at this juncture than writing a half-hearted blog post about the out-of-this-world fried ice cream I made on Cinco de Mayo. (Though I WILL tell you about that some day – it’s too late for you to make it for Cinco de Mayo anyway).

To sum up this rambling, I just want you to know (5 readers – if there are still 5 of you) that this blog is not done. That is the one promise I can make.

Tell me, regular bloggers, how do you make time to blog? Or just tell me that I’m terribly lazy and have poor time-management skills. Or tell me anything, really.

Saturday, April 21, 2012

Copycat Recipe: Avocado Margarita

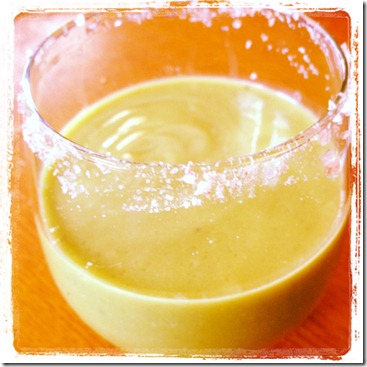
Remember when I told you about the Avocado Margarita I couldn’t get enough of at La Cava del Tequila in the Mexico Pavilion at Disney’s Epcot? Well, I’ve been meaning to recreate it for awhile now but never got my act together and bought all the ingredients. My parents, visiting from Maine this weekend, generously made a stop at the New Hampshire State Liquor store for me and so it became my mission to recreate the drink this weekend.

photo (2)

Avocado Margarita

(serves 1)

Ingredients:

  • 1 oz Midori Melon Liquer
  • 2 oz Silver Tequila (I used Sauza)
  • 2 oz fresh lime juice (from 2 limes)
  • 1/2 ripe avocado
  • 8-10 ice cubes
  • 1 oz light agave syrup
  • coarse salt for the rim of your glass (optional)

Put all ingredients in a blender (I used my food processor because I don’t have a blender and I do NOT recommend it). Blend until smooth. Wet rim of glass and roll in coarse salt. Pour your margarita into your glass and enjoy!

Saturday, March 24, 2012

Coconut and Crispy Kale Millet Bowl

I’ve had Heidi Swanson's Supernatural Every Day on my reserve list at the library for months. Unfortunately, the one time it became available I didn’t make it in the allotted 7 days to pick it up and haven’t gotten a second chance yet.

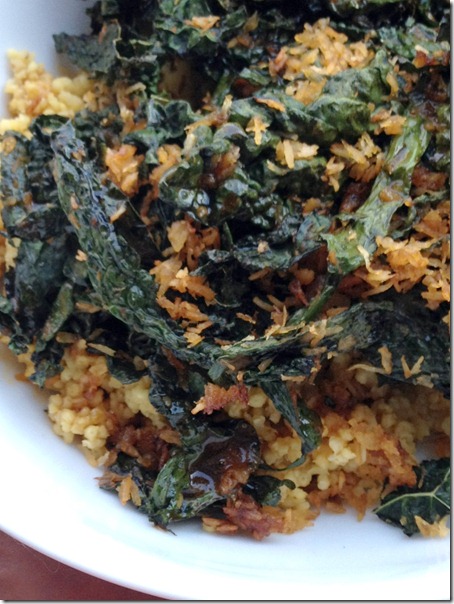
I was thrilled back in January when Joy posted the recipe from Heidi’s book for the crunchy kale and coconut bowl. (I call mine ‘crispy’ because it seems more appropriate for my rendition.) Back in January when she posted the recipe, I immediately made it twice in the same week. And though I’ve thought about this dish every single time I’ve had kale in the house since, I’ve only just made it again, for you loyal readers. Since that day was today, I can say with authority that it is definitely worth turning my oven on for (even on crazy March days when the temperature reaches 80 degrees outside).

063


Coconut and Crispy Kale Millet Bowl

serves 2 as a main, from here and here

Ingredients:

  • 2 T tamari or soy sauce
  • 1 t rice vinegar
  • 1 t sriracha
  • 1/4 c extra virgin olive oil
  • 5 c lacinato kale, ripped into bite size pieces
  • 1/2 c shredded coconut
  • 1/2 c millet, uncooked
  • 1 1/2 c vegetable broth (or water – for cooking millet)

Preheat oven to 350 degrees. Prepare baking sheet with parchment or tin foil. Begin cooking your millet (or other grain). Lightly toast millet in saucepan over medium heat for about 2 minutes. Add broth and bring to a boil. Reduce heat to low, cover and allow to cook (without stirring) for 15 minutes or until all liquid is absorbed. Don’t stir the millet, it will get mushy if you do (I know this from experience!) When it’s done, lightly fluff it with a fork.

In a small jar, or bowl, mix tamari, rice vinegar, and sriracha. If using a jar with a lid, add olive oil and shake vigorously until mixed. If using a bowl, pour in olive oil and whisk to emulsify. Put aside.

Tear clean kale off stems and rip into bite size pieces. Add coconut and about 1/2 of dressing. Toss and then spread onto prepared baking sheet. Bake for 10-15 minutes (check every few minutes after 10 to prevent burning – it happens fast!) Kale is done when it is crispy to the touch, if still soft, keep it in the over for 2 minute intervals until crispy.

Serve kale atop prepared millet and top each portion with 1/2 of the remaining dressing. Enjoy!

Thursday, March 8, 2012

Birthday Cake Donuts

A few weeks ago it was our friend Clare’s birthday; it had been far too long since I’d busted out the donut pan – so birthday cake donuts it was!

003

Birthday Cake Donuts

adapted from Cookies and Cups

Ingredients:

For the Donuts…

  • One box Funfetti or Confetti Cake Mix
  • 3/4 c buttermilk (I used 3/4 c almond milk & 1 T lemon juice)
  • 2 eggs
  • 2 T melted coconut spread (butter substitute made by Earth Balance)

For the glaze…

  • 1/4 c almond milk
  • 2 c powdered sugar
  • 1 t pure vanilla extract

For the frosting…

  • 1 c powdered sugar
  • 1 T almond milk (plus more if needed – add by T)
  • sprinkles (definitely not optional)

Pre-heat oven to 425. Add 1 T lemon juice to 3/4 c almond milk if you are subbing for buttermilk. Mix all ingredients together (use a mixer if you are rich) and put into ziploc bag or piping bag. Cut off corner. Pip into your donut pan. Don’t over fill! A little over 1/2 full is perfect… otherwise you will end up with duffins (donut-muffins) like I did. Bake 7-9 minutes, just until browned. Place on cooling rack. Make 2nd batch… recipe should make 12 donuts or so.

For the glaze, combine ingredients in a medium sauce pan over low heat. Coat your donuts in glaze while the pan is still on low heat… place glazed donuts back on cooling rack. (Optional: perform taste test on semi-cooled glazed donuts)

For the frosting, mix together sugar and almond milk until smooth. Spread 1 t of frosting on cooled glazed-donuts, top with sprinkles. (Not optional: eat at least 2 more and complain of stomach pains for the rest of the night)

*For more technical instructions and tutorial, please see linked post. I know you don’t expect such from me.

002

My batch yielded more than a dozen but I don’t want to make you any promises. This was a win-win situation because I was still able to bring a dozen to the party, eat a few for quality control purposes, and have one the day after the party to perform freshness measures (I do it for you, blog friends).

Thursday, February 9, 2012

Lately…

So, I haven’t posted in nearly a month. My longest streak since I started this little blog nearly two years ago. I could claim I’ve been too busy but I’m pretty sure there are bloggers out there busier than I am that post on a regular basis. So I don’t know what it is. But I have been eating, drinking and having some good times. With a gentle return to the blog world, I present you my life, lately, in instagram:

Picnik collage

1-4: Beers and appetizers at Hingham Beer Works with mom and dad back in January. 5-6: One of my favorite wines and wine shop at Fresh Market, Hingham. 7-8: Griffy sits with on his grammie and pretzel crusted mac & cheese made by the man-friend. 9: An afternoon Pacifico at Acapulco’s, Quincy with my parents. 10: The ruler of my roost. 11: Snowed in Vampire Diaries marathon – with myself. 12: Friends came to visit and we saw “American Idiot” at the Boston Opera House. 13: An after work beer with my former roomie at Fat Cat, Quincy. 14: Hot peppers prior to chopping for one of the most delicious blogger-inspired recipes I’ve ever made. 15: Sunday morning coffee via Spiderman. 16: Kale-Chickpea Coconut Curry Soup.

See? I’m still doing stuff… even if it isn’t blogging.

Wednesday, January 18, 2012

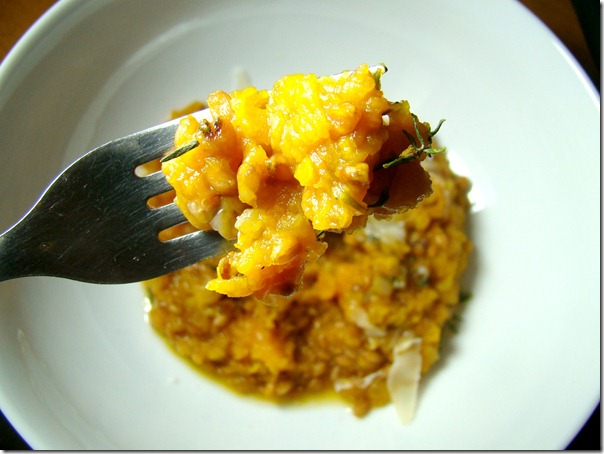
Butternut Squash Wheatberry Fauxsotto

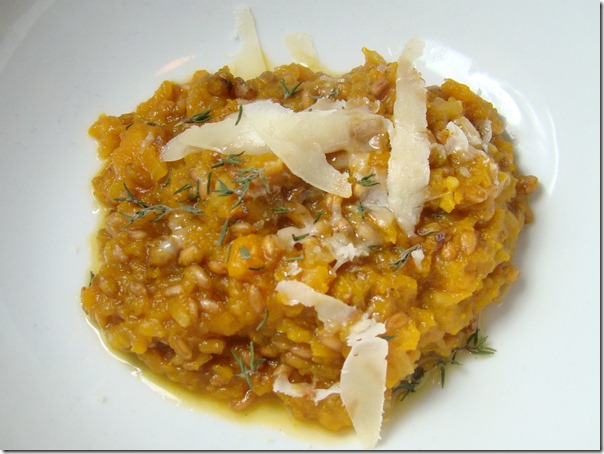
DSC07833

I won’t call this a risotto because it’s not. It takes much less time than a traditional risotto and doesn’t quite achieve the ability of risotto to “stand-up” when it’s ready. What this is is one of the most flavorful dishes I’ve prepared in a long time and yet it is so incredibly simple it can easily be made on a weeknight when time is minimal.

Butternut Squash Fauxsotto

adapted from Peanut Butter Fingers

Ingredients:

  • 3/4 c wheatberries (mine are from the Whole Foods bulk bins)
  • 3 c broth (I used chicken but use whatever you prefer)
  • 2 c butternut squash, chopped
  • 1 t fresh Thyme, chopped
  • 1 T olive oil
  • 1/2 onion, chopped (optional, I used dehydrated onion flakes)
  • Salt and Pepper, to taste
  • Parmesan Cheese, for topping

In a large saucepan, heat olive oil over medium heat. Add onions and Thyme until onions soften (if you use dehydrated onions you don’t really need to wait) add wheatberries and cook, stirring often, for just a few minutes.

Turn up heat to medium-high, add 2 c broth and squash. Stir constantly but allow pot to simmer.  The squash will break down and the broth will absorb. After 2 c of broth is absorbed, begin adding a little more broth at a time until it is absorbed. Repeat until last cup of broth has been added. When the fauxsotto has thickened, it is done.

Serve with fresh grated parmesan on top and optionally add sprigs of fresh Thyme for garnish.

Serves 2

DSC07845

Saturday, January 7, 2012

Blood, Bones & Butter

blood

Over vacation I discovered that I can borrow e-books from the library and read them on my laptop using Kindle for PC. A few I titles I was interested in were already “checked out” but Blood, Bones & Butter: The Inadvertent Education of a Reluctant Chef was available and it sounded worth my time.

What a great read! I couldn’t “put it down”. It’s a memoir written by Chef Gabrielle Hamilton of Prune restaurant in New York City. She starts by reminiscing of her childhood and her family’s annual pig roasts and the imagery is just incredible. As an adult, she marries an Italian and spends a month every summer in Italy – so as you can imagine, her descriptions of her time there are fascinating.

Though I had never heard of her prior to reading this book, I am definitely a fan of her approach at cooking (and eating!) as it is much similar to mine (I’d like to think, anyway) in that she takes a “no frills” approach. She believes that food should be straight forward and that the flavors should come from the quality of the food itself and not by adding “foams” or “emulsions”.

If you are a fan of memoirs, especially ones that involve food, you will enjoy this book. The author’s journey to becoming a chef was both an accident and an adventure.

Side note: I totally recommend the e-book feature from the library – getting a book to read for free (for a 14 day rental period) without even leaving my house? Sounds good to me!

Monday, January 2, 2012

Vegan Lentil Pâté

DSC07803__sharpshot_active_Version1

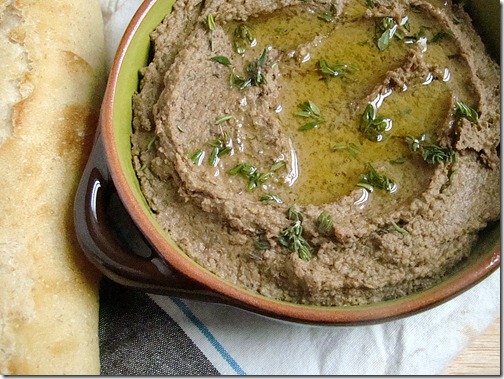
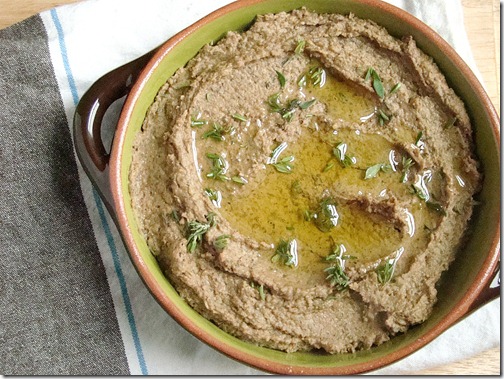
If you’ve had pâté before, the animal kind, and enjoyed it – then you will most likely be a fan of this vegan version. As you may know if you eat lentils, they almost mimic meat in that they are protein rich and super filling. While the flavors in this create a pâté that is unique, it is remarkably reminiscent of it’s animal-based counterparts.

DSC07804__sharpshot_active_Version1

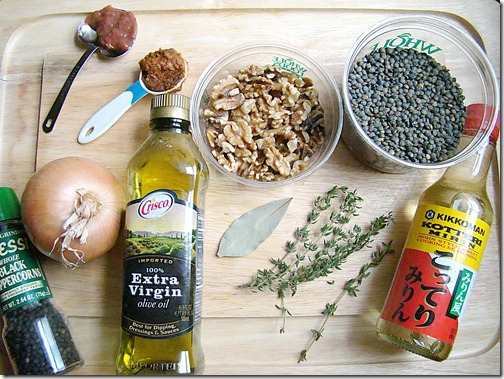
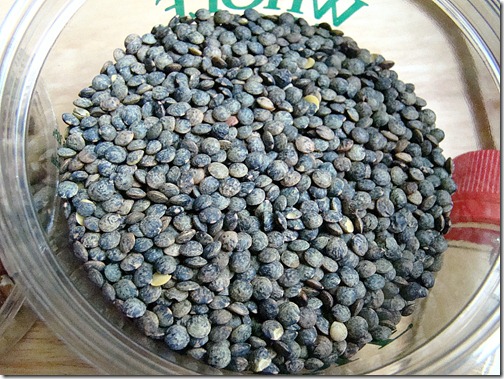
If you’re skeptical, I don’t blame you. There are a bunch of less common, perhaps even intimidating, ingredients in this recipe. Finding Umeboshi paste (plum paste) took a trip to the local Asian Supermarket where I could not find it, a trip to my local health food store where it was too expensive for my wallet and finally a trip to Whole Foods where I splurged on it because I had a gift certificate. The Mirin (sweet cooking sauce) and Miso I picked up at the Asian Supermarket for quite a bit less than the regular supermarket/health food store. The French lentils I picked up in the bulk bins at Whole Foods and they were even cheaper at my local health food store. So all in all, it’s not a cheap dish but you’ll only be using a bit of the more expensive ingredients so you can make it many times (and I suspect after one taste you will want to) over.

DSC07805__sharpshot_active_Version1

If it’s the actual idea that this is pâté that makes you reluctant, perhaps you are vegan, don’t let that deter you. It doesn’t taste “meaty” by any means, it is reminiscent of pâté in that it has great depth of flavors.

DSC07815__sharpshot_active_Version1

Vegan Lentil Pâté

from Bojon Gourmet

Ingredients:

  • 3/4 c dried green lentils (sometimes called “French lentils”)
  • 3 c water
  • 1 bay leaf
  • 3 T olive oil, divided
  • 1 med yellow onion, chopped
  • 6 cloves garlic, peeled and chopped
  • 1 T Mirin
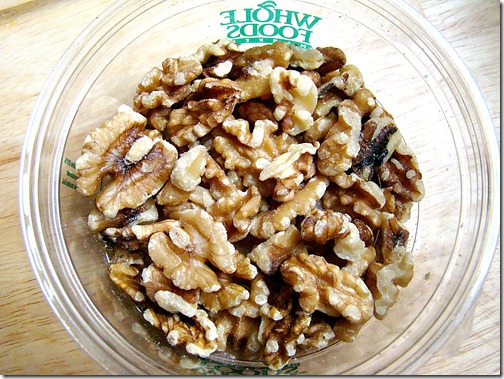
  • 1 1/4 c walnuts (I used a combination of walnuts, pecans and cashews – what I had on hand), toasted in oven at 350 for 10 minutes and cooled
  • 1 T fresh thyme, chopped
  • 3 T miso (I used the yellow/brown variety)
  • 1 1/2 T Umeboshi paste
  • Freshly ground black pepper
  • Olive oil for drizzling

Add water, lentils and bay leaf to a sauce pan. Bring to a boil then cover partially and reduce to a simmer for about 20 minutes until lentils are tender but not mushy. Stir occasionally to ensure lentils don’t stick to bottom of pan. When lentils are done, drain and allow to cool completely. I suggest putting them in the refrigerator, spread on a plate, to speed up the process.

While lentils are cooking, add 2 T olive oil to another pan heated over medium heat. Sauté onion and garlic until onions are golden, about 15 minutes. Stir in the Mirin and remove from the heat. Allow to cool completely, I put mine in the refrigerator to speed this up.

Add the toasted and cooled nuts to the food processor and process until they have become the consistency of nut butter. Add the lentils and onion-garlic mixture and process until smooth. Add in the remaining ingredients and process until smooth.

Drizzle with olive oil and additional fresh herbs for serving. I served mine with a baguette cut into thin slices.

DSC07811__sharpshot_active_Version1